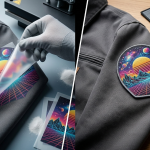
Every year, thousands of custom patches are designed, ordered, and shipped, and a surprising number of them end up sitting in a drawer instead of on a jacket, backpack, or vest. The design looked great on screen, but it never translated into something people were excited to wear. As a professional patch maker, we see this pattern constantly, and it almost always comes down to a handful of avoidable design mistakes.
This guide breaks down exactly what separates a patch nobody touches from one that becomes part of someone’s everyday style. Whether you are designing for a brand, a motorcycle club, a sports team, or a personal project, these 15 expert tips will help you create a patch with real wearability, not just visual appeal.
Why Most Custom Patch Designs Never Get Worn
The biggest mistake in patch design is designing for a flat screen instead of a moving, textured piece of fabric. A logo that looks sharp on a laptop can lose all its impact once it is stitched onto a curved shoulder or a thick denim jacket. Colors shift under different lighting, tiny text disappears into thread, and busy graphics turn into a blur from three feet away. Wearable patch design is not just about aesthetics, it is about function, fit, and how the piece performs in real life.
15 Expert Tips for Designing a Custom Patch People Will Actually Wear
1. Start With the Garment, Not the Graphic
Before opening a design program, decide where the patch will live. A patch for a denim jacket back panel behaves differently than a small chest patch for a uniform shirt. The garment dictates the shape, size, and even the color palette that will look natural once it is applied.
2. Keep Text to a Minimum
Long taglines or paragraph-style text rarely survive the transition to fabric. Limit lettering to a name, a short phrase, or a single word that reinforces the main graphic. Simpler text stitches cleaner and reads instantly, even from a distance.
3. Choose Bold, High-Contrast Colors
Fabric does not reproduce color the same way a screen does. Muted gradients and pastel-on-pastel combinations often flatten out once stitched. Bold, high-contrast color pairings hold their shape and remain legible whether the patch is on a black hoodie or a tan cap.
- Match the Patch Style to Its Purpose
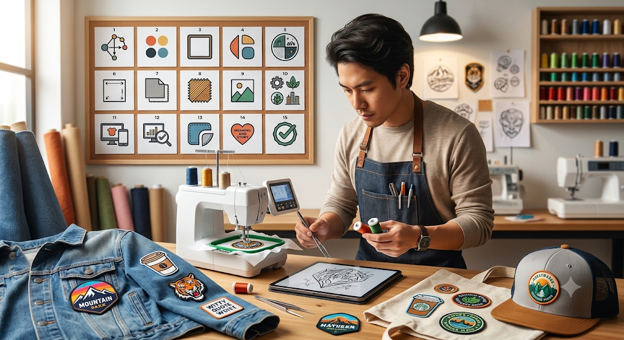
Not every design belongs on the same type of patch. A clean corporate logo often looks best as an embroidered patch, while a bold outdoor or automotive logo may perform better as a PVC patch built to survive rain and rough handling. Varsity-style lettering usually calls for a chenille patch, and designs with fine detail or gradient shading are often better suited to woven patches. Matching the material to the design intent is one of the fastest ways to boost wearability.
5. Get the Size Right Before You Design
Sizing mistakes are one of the most common reasons patches get shelved instead of worn. A patch that is too large overwhelms a garment, while one that is too small loses all its visual impact. Reference a proper custom patch sizing guide and measure the intended placement area before finalizing your artwork dimensions.
6. Pick a Border That Defines the Shape
A clean merrowed or heat-cut border keeps a patch looking finished and prevents fraying over time. Skipping a defined border often makes a design look unfinished once it is on fabric, even if the artwork itself is strong.
7. Think About Backing Type Early
Iron-on, sew-on, Velcro, and adhesive backings each affect how and where a patch will realistically get used. A Velcro backing is ideal for tactical gear or rotating patches, while iron-on backing suits a permanent placement on a jacket. Choosing the backing during the design phase, not after production, avoids costly reordering.
8. Avoid Fine Detail That Embroidery Can’t Capture
Thin lines, tiny serif fonts, and photo-realistic shading rarely translate well into thread. If your design includes intricate detail, work with a professional embroidery digitizing service to simplify the artwork into stitch-ready shapes without losing the design’s core identity.
9. Design for Distance, Not Close-Up
Most people will see a patch from several feet away, not up close. Test your design by shrinking it down and viewing it at a small scale. If the main elements are still recognizable, the design will likely hold up on a real garment.
10. Use Negative Space Strategically
A busy patch that fills every inch with color and detail often looks cluttered once stitched. Leaving intentional negative space gives the eye a place to rest and makes the focal graphic stand out more clearly
11. Consider the Fabric It Will Sit On
A design that pops on light denim can disappear on black leather, and vice versa. If the patch will be sold or distributed for use on multiple garment colors, build in a border or backing color that works across different fabric tones.
12. Test Your Design in Black and White First
Converting your artwork to grayscale is a quick way to check contrast and legibility before committing to thread colors. If the design still reads clearly in black and white, the color version will almost always perform well.
13. Add a Touch of Personality or Humor
Patches with a strong point of view tend to get worn more often than generic, purely decorative designs. Whether it’s a motto for a motorcycle club or a witty phrase for a morale patch, designs with character build an emotional connection that drives people to actually display them.
14. Keep Brand Consistency Across a Patch Series
If you are designing multiple patches for one brand, team, or organization, keep the color palette, border style, and typography consistent. A cohesive series feels collectible, which encourages people to wear and trade multiple pieces rather than just one.
15. Get a Physical Sample Before Bulk Production
A digital proof never fully shows how thread, color, and texture will look in person. Requesting a physical sample before committing to a large production run gives you the chance to catch sizing, color, or stitch issues while changes are still easy and inexpensive to make.
Choosing the Right Patch Material for Wearability
Material choice has a direct impact on how comfortable, durable, and visually strong a finished patch turns out to be. Here is a quick comparison to help match your design to the right production method.
| Patch Type | Best For | Feel & Weight | Durability |
| Embroidered Patches | Logos, uniforms, team gear, classic looks | Textured, raised thread | Very high, years of wear |
| PVC Patches | Outdoor gear, bags, bold 3D logos | Rubbery, flexible, waterproof | Excellent, weatherproof |
| Chenille Patches | Varsity jackets, letterman style | Thick, soft, plush yarn | High, built for heavy fabric |
| Woven Patches | Fine detail, small text, gradients | Flat, tightly woven finish | High, smooth and lightweight |
| Leather Patches | Hats, premium branding, rugged wear | Firm, structured, ages well | Very high, long lifespan |
Common Custom Patch Design Mistakes to Avoid
- Using too many colors, which raises production complexity and muddies the design once stitched.
- Ignoring garment curvature, causing flat designs to distort once applied to sleeves or caps.
- Skipping a mockup on the actual fabric color the patch will be used on.
- Choosing a backing type that does not match the end use case.
- Cramming a logo and a tagline into a patch that is simply too small to hold both clearly.
Frequently Asked Questions
What makes a custom patch design wearable rather than just decorative?
A wearable patch design balances bold, simplified graphics, appropriate sizing for its placement, and a material choice suited to the garment it will sit on. Designs that are legible from a distance and hold up structurally over repeated wear are far more likely to actually get used.
What is the best size for a jacket or vest patch?
Sizing depends on placement, but most back panel patches range from 8 to 11 inches wide, while chest or sleeve patches typically stay between 2 and 4 inches. For an exact breakdown by garment type.
Should I choose embroidered or PVC patches for better wearability?
Embroidered patches offer a classic textured look ideal for uniforms and apparel, while PVC patches are more weatherproof and hold up well on bags, outdoor gear, and tactical equipment. The right choice depends on where and how often the patch will be worn.
How much text is too much on a custom patch?
As a general rule, limit text to one short phrase or a name. Anything beyond a few words tends to shrink below a legible size once stitched, especially on smaller patches.
Can I see a sample before ordering patches in bulk?
Yes, requesting a physical or digital proof before full production is standard practice and strongly recommended, since it lets you confirm color accuracy, stitch quality, and sizing before committing to a larger order.
How long does it take to get custom patches made?
Production timelines vary by patch type and order size, but most custom orders are completed within one to two weeks after artwork approval, with rush options often available.
Make Every Patch Worth Wearing
A great patch design starts with understanding how it will actually be worn, not just how it looks on a screen. By focusing on sizing, material, contrast, and purpose, you can create a patch people are proud to display rather than store away. The Eagle Patches USA works with brands, clubs, and individuals every day to turn ideas into patches people genuinely want to wear.