Getting the size right is one of the most consequential decisions when ordering a custom patch, and one of the most frequently misunderstood.
This comprehensive guide answers every sizing question before you place an order: standard size ranges for all major patch types including embroidered, woven, PVC, chenille, iron-on, Velcro, and leather; placement-specific size charts for jackets, sleeves, chests, hats, bags, uniforms, and more; application sizing for military, morale, sports, and uniform patches; how fabric, thread count, and backing type interact with size decisions; a step-by-step measuring guide and the most common sizing mistakes to avoid.
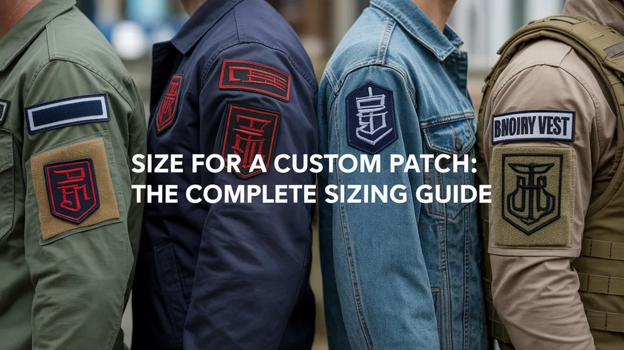
Size For A Custom Patch (Why Getting It Right Matters More Than You Think)
Choosing the wrong size for a custom patch is one of the most common and costly ordering mistakes. A patch that is too large overwhelms the garment and looks unprofessional. A patch that is too small loses critical detail, especially in embroidered designs with fine text or intricate artwork. And in applications where size is regulated, such as military uniforms, law enforcement, or professional sports, an incorrect dimension can mean the patch fails compliance entirely.
The right patch size is never universal. It depends on four things working together:
- The patch type: embroidered, PVC, woven, chenille, iron-on, Velcro, or leather
- The garment or item it will be attached to
- The placement location: chest, sleeve, back panel, hat, bag, collar, etc.
- The design itself: its complexity, text size, and level of detail
This guide breaks all four dimensions down systematically, so whether you are ordering a single custom morale patch or a thousand uniform patches for a corporate team, you will have the exact sizing knowledge you need before you commit to production.
Standard Custom Patch Sizes at a Glance
Before diving into patch-type and placement specifics, here is a general-purpose size reference that applies to most embroidered and woven patches across the U.S. market. Manufacturers typically work in standard increments such as 1 inch, 1.5 inches, 2 inches, 2.5 inches, 3 inches, and 4 inches, and pricing scales with size.
| Size Category | Dimensions (inches) | Most Common Use |
| Extra Small | 1 x 1 to 1.5 x 1.5 | Lapels, hat pins, small brand logos |
| Small | 1.5 x 2 to 2 x 3 | Hat fronts, cap patches, small chest logos |
| Medium | 2.5 x 3 to 3 x 4 | Sleeve patches, chest patches, name patches |
| Large | 3.5 x 4 to 4.5 x 5 | Jacket chest, large sleeve, bag patches |
| Extra Large | 5 x 6 to 8 x 10 | Jacket backs, club colors, large uniform pieces |
| Oversized | 10 and above | Full back patches, commemorative pieces |
Pro Tip
Most U.S. patch suppliers accept custom size requests outside standard increments, but sticking to standard sizes typically speeds up production and reduces tooling costs. Always confirm your exact finished size in writing before approving production.
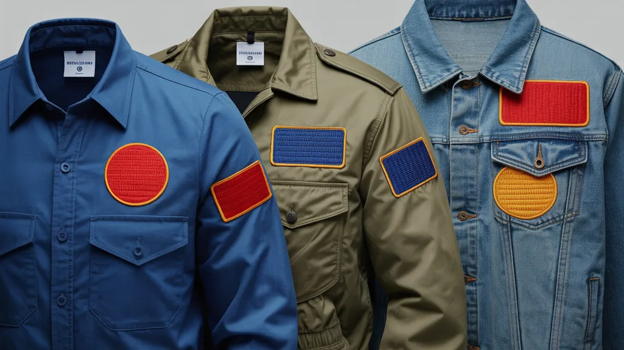
Custom Patch Sizes by Patch Type
Different patch styles have different sizing norms, partly due to manufacturing constraints and partly due to how and where they are used. Here is a comprehensive breakdown of size recommendations for every major patch type.
Embroidered Patch Sizes
Embroidered patches are the most popular patch type in the United States and come with the widest available size range. Standard production runs from 1 inch at the minimum all the way to 12 inches or more for oversized back patches.
| Use Case / Application | Recommended Size |
| Small logo / lapel pin-style | 1 x 1 to 1.5 x 2 |
| Standard left chest logo | 2.5 x 3 to 3 x 4 |
| Name tape / rank patch | 1 x 3.5 to 1.25 x 4.5 |
| Upper sleeve / arm patch | 2 x 3 to 3.5 x 4 |
| Jacket chest, medium design | 3.5 x 4 to 4.5 x 5 |
| Jacket back, small center | 5 x 5 to 6 x 8 |
| Full jacket back patch | 8 x 10 to 10 x 12 |
Pro Tip
For embroidered patches, text should be no smaller than 0.25 inches. If your design has very fine details, increase the patch size by at least 0.5 inch in each dimension to preserve stitching definition.
Woven Patch Sizes
Woven patches are thinner and hold finer detail than embroidered patches, making them ideal for intricate logos, small text, and complex artwork. Standard woven patches range from 1 inch to 5 inches, and because of the denser weave, they maintain legibility at smaller sizes. A woven patch at 2 x 3 inches can hold roughly the same visual detail as an embroidered patch at 3 x 4 inches.
Most common woven patch sizes: 1.5 x 2, 2 x 3, 2.5 x 3.5, and 3 x 4 inches.
PVC / Rubber Patch Sizes
PVC patches are three-dimensional, tactile, and highly durable. They are popular for tactical, outdoor, and morale applications across the U.S. They range from 2 x 2 inches to 4 x 4 inches in standard formats, with custom shapes and sizes available through most manufacturers.
| Shape | Standard Size Range |
| Square / Rectangle | 2 x 2 to 3.5 x 4.5 |
| Circle / Round | 2 inch diameter to 4 inch diameter |
| Custom shape | 1.5 inch minimum in any dimension |
| Large format | Up to 6 x 6, structural limit |
Unlike embroidered patches, PVC does not require the same minimum detail size considerations because the 3D molding process holds fine lines cleanly even at smaller dimensions. PVC is self-supporting, so it maintains its shape without interfacing or backing stiffeners.
Iron-On Patch Sizes
Iron-on patches are available in the same general size range as embroidered patches. For reliable long-term adhesion, the practical maximum for iron-on backing is 4 x 5 inches. Beyond this size, the adhesive bond becomes uneven under home iron pressure, and edges begin to peel, especially after repeated washing.
Pro Tip
For patches larger than 4 x 5 inches with iron-on backing, always add perimeter stitching around the patch border after application. This preserves the patch through washing and wear.
Chenille Patch Sizes
Chenille patches have a distinctive raised, fluffy texture and are most commonly seen on varsity jackets, athletic wear, and school letterman items. Due to the nature of chenille weaving, they run large by default. Chenille smaller than 2 x 2 inches loses its textural identity.
| Chenille Application | Standard Size Range |
| Single letter, varsity style | 3 x 3.5 to 4 x 5 |
| Mascot / team logo | 4 x 5 to 7 x 8 |
| Varsity jacket back, partial | 6 x 8 to 8 x 10 |
| Varsity jacket back, full | 8 x 10 to 10 x 12 |
Velcro Hook-and-Loop Patch Sizes
Velcro-backed patches, standard in military, morale, and tactical applications, follow the same size norms as the underlying patch type. The critical additional consideration is MOLLE compatibility, the NATO-standard modular webbing system used on tactical vests, plate carriers, and military bags.
The most popular Velcro patch size in the U.S. is 2 x 3 inches, which fits standard Velcro loop panel slots on tactical gear. Other common MOLLE-compatible sizes include 1.5 x 2.5, 2 x 2, and 3 x 4.5 inches. If your patch will not go on MOLLE-standard panels, sizing is flexible. Follow the base patch type guidelines above.
Leather Patch Sizes
Leather patches are commonly applied to hats, bags, jeans, and workwear. They trend toward small-to-medium sizes because leather is heavier than fabric, and oversized leather patches can stiffen garments and become uncomfortable. Laser engraving and die-cutting allow highly precise sizing, making leather patches one of the most dimension-accurate patch types.
| Application | Recommended Leather Patch Size |
| Hat / cap front panel | 1.5 x 2.5 to 2 x 3.5 |
| Bag label or front panel | 2 x 3 to 3 x 4 |
| Workwear / chest placement | 2.5 x 3.5 to 3.5 x 5 |
| Denim / jeans back pocket | 2 x 3 to 3 x 4 |
Patch Sizes by Garment and Placement
Even if you know your patch type, placement transforms the sizing equation. The same 3 x 4 inch patch that looks authoritative on a jacket sleeve looks enormous on the front of a baseball cap. Here is a complete garment-by-garment breakdown.
Jacket Back Patch Size
The back panel of a jacket is the largest canvas in patch design, the place where clubs, organizations, and brands make their most powerful visual statements. Size selection here must account for the specific jacket back panel dimensions, which vary significantly by size and cut.
| Jacket Size / Application | Recommended Back Patch Size |
| Youth / junior jackets | 6 x 8 to 8 x 9 |
| Standard adult, S to L | 8 x 10 to 10 x 12 |
| Oversized / XL jackets | 10 x 12 to 12 x 14 |
| Full back coverage | Up to 14 x 14, measure first |
Pro Tip
Before ordering any back patch: measure your jacket back panel from seam to seam and from the collar seam to the hem. Leave at least 1 to 1.5 inches of margin on all sides. Patches too close to seams will cause fabric puckering on application.
Left Chest / Front Chest Patch Size
The left chest is the most common single-patch placement across workwear, uniforms, polo shirts, and military garments. It is the placement zone that most often carries logos, name identifiers, and brand marks.
| Design Type | Recommended Chest Patch Size |
| Small brand logo / icon | 2 x 2 to 2.5 x 3 |
| Standard chest logo | 3 x 3 to 3.5 x 4 |
| Large emblem / crest | 4 x 4 to 5 x 5 |
| Polo / dress shirt, max | 2.5 x 3 to maintain a professional look |
Center the patch approximately 3 to 4 inches below the shoulder seam and 1 to 2 inches from the center line of the garment. For polo shirts and formal workwear, choose the smaller end of the range.
Sleeve Patch Sizes
Sleeve patches appear on the upper arm, lower arm, or cuff area. They are standard on military uniforms, law enforcement gear, sports jerseys, and workwear. The critical constraint is sleeve width. The patch should leave at least 0.75 inch clearance from the sleeve side seams.
| Garment Type | Recommended Sleeve Patch Size |
| Military / tactical jacket | 2.5 x 2.5 to 3.5 x 3.5 |
| Work shirt or jacket | 2.5 x 3 to 3.5 x 4 |
| Sports jersey, upper arm | 2 x 3 to 3 x 4 |
| Hoodie / sweatshirt | 2.5 x 3.5 to 4 x 5 |
| Lower sleeve / cuff area | 1.5 x 2 to 2.5 x 3 |
Upper sleeve patches typically sit 1 to 2 inches below the shoulder seam. For lower sleeve placements, reduce the recommended size by about 30% to maintain correct visual proportion.
Hat and Cap Patch Sizes
Hat patches are one of the most popular and most size-sensitive patch applications. The available space is tightly constrained by the hat structure, and structured caps curve, which can distort a flat patch if it is oversized.
| Hat / Cap Style | Recommended Patch Size |
| Snapback / baseball cap, front | 2 x 2.5 to 2.5 x 3.5 |
| Trucker cap, foam/mesh front | 2 x 3 to 2.5 x 3.5 |
| Beanie / knit hat | 1.5 x 2 to 2.5 x 3 |
| Bucket hat, front panel | 1.5 x 2 to 2 x 3 |
| Dad hat / unstructured cap | 1.5 x 2 to 2 x 3 |
| Side panel, any cap style | 1 x 1.5 to 1.5 x 2.5 |
Pro Tip
Most structured baseball caps have a front panel around 3.5 to 4 inches wide and 2.5 to 3.5 inches tall. Patches over 3 inches wide will curve with the brim on structured hats. For flat patches such as woven labels or leather badges, keep width at 2.5 inches or under for clean results.
Bag and Backpack Patch Sizes
Patches on bags and backpacks vary significantly based on the placement zone, such as front pocket, main panel, or side panel, and the bag overall size. For tactical backpacks with MOLLE webbing, the Velcro loop panel size is the key constraint.
| Placement Area | Recommended Patch Size |
| Small front pocket | 2 x 2 to 3 x 3 |
| Medium front main panel | 3 x 3 to 4 x 5 |
| Large backpack main panel | 4 x 5 to 6 x 8 |
| Tactical MOLLE panel | 2 x 3, Velcro standard |
| Messenger bag / tote side | 2.5 x 3 to 4 x 5 |
Shirt and Uniform Patch Sizes
For shirts, work shirts, dress shirts, polo shirts, and T-shirts, patch sizing must be proportionate with both the garment size and the specific placement location. Professional uniforms often have regulated placement zones with allowable dimensions defined by the organization.
| Placement | Recommended Size |
| Left chest logo | 2 x 2 to 3 x 3 |
| Right chest name tape | 0.75 x 3 to 1.25 x 4.5 |
| Shoulder / sleeve insignia | 2.5 x 3 to 3.5 x 3.5 |
| Upper back, yoke area | 3 x 5 to 5 x 7 |
| Full back panel, shirt | 7 x 9 to 10 x 12 |
Jeans and Pants Patch Sizes
Denim patches are popular for casual fashion, workwear reinforcement, and garment repair. Jeans patches need to be durable because knees and seat areas see heavy wear.
| Placement Area | Recommended Size |
| Back pocket exterior | 3 x 4 to 4 x 5 |
| Thigh / hip patch | 3 x 3.5 to 5 x 6 |
| Knee reinforcement patch | 5 x 6 to 7 x 8 |
| Waistband / belt area accent | 1 x 1.5 to 1.5 x 2 |
Iron-on patches are common for denim customization, but for high-wear areas like knees, always choose sew-on patches with reinforced backing for long-term durability. Iron-on adhesive alone will not hold on high-flex denim zones through regular wear.
Custom Patch Sizes for Specific Applications
Beyond garment placement, certain patch applications come with their own sizing conventions, regulations, or industry standards. Here is what you need to know for the four most common categories.
Military Patch Sizes
Military patches in the United States follow strict size standards defined by branch-specific uniform regulations. For the U.S. Army, sizes are governed by Army Regulation AR 670-1. Other branches maintain equivalent regulatory documents. Understanding these standards is critical for compliance in official uniform applications.
| Military Patch Type | U.S. Standard Size |
| Unit sleeve insignia, SSI | 2.5 x 2.5 to 3.5 x 3.5 |
| Branch name tape | 1 x 4.5, standard |
| Last name tape | 1 x 4 to 1 x 4.5 |
| U.S. Flag, right shoulder, Army | 2.125 x 3.5 |
| U.S. Flag, other branches | 1.75 x 2.5 |
| Beret flash | 2 x 3 to 2.5 x 3.5 |
| Combat patch, right shoulder SSI | 2.5 x 2.5 to 3.5 x 3.5 |
| Service stripes | 0.5 x 3.5 per stripe |
For authentic, regulation-compliant military patches, visit our Custom Military Patches page, where we produce patches meeting U.S. branch specifications for official and commemorative applications.
To understand how military patches are structured beyond size, including their historical meaning, types, and how insignia systems work, read the Military Patches: Meaning, Types & How Military Patches Work Guide.
Morale Patch Sizes
Morale patches are defined by their creativity and identity expression, and nearly always by their Velcro backing and compatibility with tactical gear panel slots. In the U.S. market, morale patch sizing has converged on a clear standard.
| Morale Patch Format | Size |
| Standard square | 2 x 2 to 3 x 3 |
| Standard rectangle, most popular | 2 x 3 |
| Large / oversized | 3 x 4 to 4 x 4.5 |
| Hat / cap format | 1.5 x 2.5 to 2 x 3 |
| MOLLE panel standard | 2 x 3, industry norm |
The 2 x 3 format is the de facto industry standard for morale patches across the U.S. It fits neatly on helmet bands, plate carrier panels, and tactical Velcro boards. Patches outside this size are considered non-standard and may not fit commercial Velcro loop panels.
For more info on morale patches check out, Custom Morale Patch: A Look at Types, Materials, and Ordering.
Sports Team Patch Sizes
Sports patches appear on jerseys, team jackets, bags, and athletic gear. Sizing varies by sport and level of play. Recreational leagues have more flexibility, while professional and regulated leagues may define exact patch placement zones.
| Sports Patch Application | Recommended Size |
| Jersey chest crest / logo | 2.5 x 3 to 4 x 4 |
| Jersey sleeve number badge | 2 x 2 to 3 x 3 |
| Team jacket chest | 3 x 3 to 4 x 5 |
| Team jacket back, logo | 6 x 8 to 10 x 12 |
| Athletic bag / backpack | 3 x 3 to 4 x 5 |
| Championship / commemorative | 2.5 x 3.5 to 4 x 5 |
For regulated leagues and tournaments, always verify size requirements with league officials before ordering.
Uniform Patch Sizes
Professional uniform patches span law enforcement, security, fire and EMS, hospitality, and corporate environments. Many of these have defined placement zones documented in organization dress codes, NFPA standards, or agency-specific regulations that dictate both patch size and location.
| Uniform / Industry Type | Typical Patch Size |
| Law enforcement badge / unit patch | 3 x 3.5 to 4 x 4.5 |
| Security shoulder patch | 3 x 3 to 4 x 4 |
| Fire department / EMS | 3 x 3.5 to 4 x 5 |
| Corporate / hospitality logo | 2 x 2.5 to 3 x 3.5 |
| School / organization patch | 2.5 x 3 to 4 x 4 |
Name Tape and Name Patch Sizes
Name patches are among the most size-standardized categories in the patch world because they need to fit specific garment zones, typically the chest area above a breast pocket or on a designated name strip.
| Name Patch Type | Standard U.S. Dimensions |
| Military-style name tape, standard | 1 x 4 or 1 x 4.5 |
| Civilian uniform name patch | 0.75 x 3 to 1.25 x 4.5 |
| Embroidered name patch on shirt | 1 x 3.5 to 1.25 x 4.5 |
| Woven name label, fine text | 0.5 x 2.5 to 0.75 x 4 |
Name tapes should maintain a minimum text height of 0.25 inches in embroidery to ensure letter legibility. Woven name patches can hold slightly smaller text at the same patch dimensions due to the finer thread count.
How Fabric and Backing Type Affect Your Patch Size Choice
Two often-overlooked factors can significantly influence your optimal patch size: the thread coverage of the embroidery design, and the backing type selected for attachment. Both interact directly with how size performs in the real world.
The Role of Thread Count and Embroidery Fill Percentage
Embroidered patches are rated by thread coverage percentage, typically 50%, 75%, or 100% fill. The fill percentage affects three size-related variables:
- Minimum functional size: high-coverage designs such as dense fills and gradients require larger patches to hold all detail. Low fill designs work well at 1.5 to 2 inches; high fill designs need 3 inches or more for clean stitching resolution.
- Visual clarity at smaller sizes: a 75 to 100% fill design at 2 x 2 inches will look muddy and packed. The same design at 3 x 4 inches will look sharp and defined.
- Patch weight: higher fill percentage means a heavier patch. On lighter fabrics such as cotton T-shirts or thin polos, a heavy dense patch can distort the fabric. In these cases, use a slightly smaller size to reduce weight load.
Pro Tip
For patches with logos that include thin lines, fine gradients, or small text alongside other design elements, add at least 0.5 inch to each dimension compared to your initial estimate. The extra space allows stitches to resolve correctly without compressing.
Backing Options and Their Sizing Implications
The backing type does not change a patch’s external dimensions, but it significantly affects how size interacts with application reliability, garment weight tolerance, and long-term durability.
| Backing Type | Sizing Implication |
| Sew-on, plain merrow border | Works at all sizes; the most reliable for large patches 5 inches and above |
| Iron-on, heat adhesive | Best at 4 x 5 or smaller; larger sizes risk uneven adhesion and edge peeling |
| Velcro, hook and loop | Patch size must match the loop panel on the garment; leave room for alignment |
| Adhesive, peel-and-stick | Best under 3 x 3; not suitable for high-stress or frequently washed placements |
| Hot-melt / industrial adhesive | Professional application only; reliable up to 6 x 6 with commercial press |
For large patches, 5 inches or larger in any dimension, sew-on backing with a merrow border is always the most reliable choice. Iron-on patches at large sizes are particularly vulnerable to peeling at the corners after washing, regardless of initial adhesion quality.
How to Measure and Choose the Right Size For a Custom Patch
The best patch size decisions start before you open the order form. Here is a reliable process for determining the correct size and the most common errors to avoid.
Step-by-Step Guide to Measuring for a Custom Patch
- Identify the exact placement zone. Be precise: upper left chest, right upper sleeve 1 inch below the shoulder seam, center back panel, etc.
- Measure the available space using a ruler or soft tape measure. Record both width and height of the open area. For curved surfaces, measure the flat portion only.
- Apply the clearance rule. Subtract 0.75 to 1 inch from each measured side to avoid overlap with seams, zippers, buttons, pockets, or collar edges.
- Check the design aspect ratio. Decide whether your artwork fits better in landscape, portrait, or square format.
- Run the minimum text check. Confirm the patch is large enough so the smallest text renders at a minimum of 0.25 inch tall in embroidery.
- Cut a paper mockup to your planned dimensions and hold it against the garment. This free step catches sizing errors before they become production mistakes.
- Request a digital proof at exact size before approving production. Most U.S. patch manufacturers provide this at no extra charge.
Common Patch Sizing Mistakes to Avoid
- Going too small to save cost. A small reduction in patch size often results in significant detail loss.
- Ignoring garment shrinkage. If the garment has not been washed yet, measure after washing.
- Assuming sizing is consistent across manufacturers. Finished patch sizes can vary slightly between suppliers.
- Placing a patch too close to a seam. Patches applied within 0.5 inch of a seam will cause fabric puckering.
- Scaling a design without reviewing detail loss. Always review a proof at the actual ordered size.
- Ordering a patch for a garment you have not measured. Sizing based on assumption is the most common source of reorders.
Design Tips to Get the Most From Any Custom Patch Size
- Keep small patches simple. Under 2 inches in any dimension, use bold outlines, solid fills, and no small text.
- Submit vector files. Always provide artwork as AI, EPS, or SVG rather than JPG or PNG. Vectors scale perfectly at any size.
- Design around your minimum text height. Plan the smallest legible text first, then build the patch size around that constraint.
- Account for shape-specific area. A 3-inch circular patch has about 7 square inches of design area, while a 3 x 3 square has 9 square inches.
- Test before ordering at scale. For bulk orders, always order a single sample first and apply it to the actual garment.
- Use the paper mockup test. Cut your planned patch dimensions from paper and hold it against the garment before ordering.
FAQs
What is the standard size for a custom patch?
The most common standard sizes for custom patches in the U.S. are 2 x 3 inches and 3 x 4 inches, depending on the application. For chest placements, 3 x 3.5 inches is the most frequently ordered. For morale and tactical patches, 2 x 3 inches is the de facto standard. There is no single universal standard. The right size depends on patch type, garment, and placement.
What size patch goes on a sleeve?
Sleeve patches are typically 2.5 x 3 to 3.5 x 4 inches for adult garments. Military sleeve insignia follow branch-specific standards, most commonly 2.5 x 2.5 to 3.5 x 3.5 inches for unit patches. Always leave 0.75 inch or more clearance from the sleeve seam on all sides.
How big should a jacket back patch be?
A full jacket back patch typically measures 8 x 10 to 10 x 12 inches for standard adult jackets. Always measure the specific jacket back panel from seam to seam and from collar seam to hem, then leave 1 to 1.5 inches of margin on all sides. Youth jackets use smaller sizes, typically 6 x 8 to 8 x 9 inches.
What is the standard morale patch size?
The standard morale patch size in the U.S. market is 2 x 3 inches. This format fits standard Velcro loop panels on tactical gear, helmet bands, plate carriers, and MOLLE equipment. Larger sizes exist but are considered non-standard and may not fit commercial loop panel slots.
What size are military uniform patches?
U.S. military patch sizes vary by patch type and branch. Unit sleeve insignia run 2.5 x 2.5 to 3.5 x 3.5 inches. Name tapes are standardized at 1 x 4 or 1 x 4.5 inches. The U.S. flag on the right shoulder is 2.125 x 3.5 inches for the Army or 1.75 x 2.5 inches for other branches.
What size patch fits on a baseball cap?
For a standard structured baseball cap or snapback, the recommended patch size for the front panel is 2 x 2.5 to 2.5 x 3 inches. Avoid patches wider than 3 inches on structured caps because they will curve with the brim and distort the design.
How do I measure for a custom patch?
Measure the target placement area with a ruler or soft tape measure. Subtract 0.75 to 1 inch from each side for seam and edge clearance. Evaluate your design minimum text height, cut a paper mockup to your planned dimensions, and request a digital proof at the exact finished size before approving production.
What is the minimum size for an embroidered patch?
Most embroidery manufacturers set a practical minimum of 1 x 1 inch for embroidered patches. At this size, only very simple designs will render clearly. For logos with text, a minimum of 2 x 2 inches is recommended. For complex artwork, start at 3 x 3 inches minimum.
Can a patch be too big for a garment?
Yes. Oversized patches can visually overwhelm the garment, cause structural stress on lightweight fabrics, and create application issues, especially with iron-on backing on large formats. As a general rule, no patch should occupy more than 80% of the available placement area.
What is the most popular custom patch size ordered in the U.S.?
The most frequently ordered sizes in the U.S. are 2 x 3, 3 x 3.5, and 4 x 4 inches, covering hat, chest, and sleeve placements respectively. For morale and tactical patches, 2 x 3 inches consistently tops ordering data.
What size patch goes on a sports jersey?
Sports jersey chest patches typically run 2.5 x 3 to 4 x 4 inches. Sleeve number badges are usually 2 x 2 to 3 x 3 inches. Championship or commemorative jersey patches are commonly 2.5 x 3.5 to 4 x 5 inches.
What is the standard size for a PVC morale patch?
Standard PVC patches range from 2 x 2 to 4 x 4 inches. The most popular PVC format for morale and tactical applications is 2 x 3 inches, matching the industry-standard Velcro panel size. PVC patches can go slightly larger than embroidered counterparts because the material is self-supporting.
The Right Patch Size Starts With the Right Fit
Choosing the right size for a custom patch is not just about picking a number from a chart. It comes down to where the patch will go, what type of patch you are ordering, how much detail your design has, and how the finished piece should look on the garment or gear. A 2″ × 3″ morale patch may be perfect for tactical gear, while a 3″ × 4″ embroidered patch can work better for a sleeve or chest placement. For jacket backs, sports uniforms, name tapes, hats, and bags, the right size changes with the surface.
The safest approach is simple: measure the placement area first, leave enough space around seams and edges, check whether your smallest text will stay readable, and ask for a proof at the exact finished size before production begins. That one extra step can save you from ordering patches that look too small, too crowded, or out of proportion once applied.
At The Eagle Patches USA, we help customers choose the right patch size before production starts, so every order fits the garment, supports the design, and looks sharp in real use. Whether you need military patches, morale patches, sports patches, uniform patches, or a fully custom design, our team can guide you on size, shape, backing, and placement before you approve your final proof.
Ready to order patches that actually fit? Share your design with Eagle Patches USA and get a custom quote with sizing guidance before production.