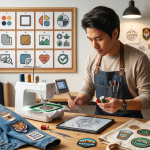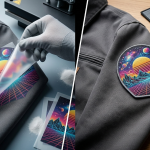
Custom headwear is really popular for complimenting your overall look. Embroidered patches are classic, with the PVC patches being really trendy now. PVC are modern and durable. They can get wet without getting ruined. The details on them are also really cool. You cannot achieve that with thread.
Many people who make custom patches are sewing them on. But you can also use a heat press to attach the patches. This method is quick and less messy. It is also easier to put them in places that are hard to reach with a needle.
Make your custom hats more creative with the addition of PVC patches. This guide will show you how to heat press PVC patches on hats in a way that is easy and fast.
Why Use a Heat Press for PVC Patches?
So you want to know about heat pressing. Before we get into it, it is really important to understand why heat pressing is useful. Heat pressing has many things going for it.
They have no stitches for a professional finish and a clean look, like something you would find in a retail store. Once the press is ready, the application is done in less than a minute, showing high speed and efficiency.
Modern heat-seal adhesives create a permanent and durable bond that can handle rough use. Heat pressing is easier than sewing on structured hats or 6-panel caps where the center seam is thick to pierce with a sewing needle or maybe hard to reach.
Now, it is time to get into the step-by-step PVC patch pressing process.
What You Need to Get Started
Before you begin, gather the following essential tools:
| Tools Needed | Description |
| Hat Heat Press | Designed specially for headwear with a curved lower plate. A standard flat press will not give the best results. |
| Custom PVC patches | It should have heat-seal adhesive backing to work properly with the heat press. |
| Cotton or Felt Hats/Caps | They can handle heat, unlike polyester. |
| Cover Sheet | Teflon (PTFE) sheets or nonstick parchment paper save the PVC patch from coming into direct contact with the heat and melting. |
| Heat Resistant Tape (Optional) | It is recommended as it holds the patch in its place during the process. |
The Step-by-Step PVC Patch Pressing Guide
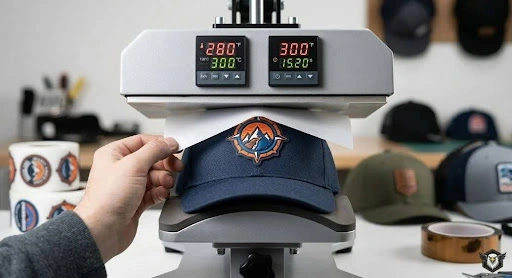
Step 1: Set Your Heat Press Parameters
Different adhesive backings have different requirements, so always check with your patch manufacturer first. However, a common starting point for PVC patches with heat-seal backing is the following:
| Temperature | 280°F to 320°F or 138°C to 160°C |
| Time | 15 to 20 seconds |
| Pressure | Medium to Firm |
Pro Tip: Apply firm pressure so the adhesive enters the fabric weave of the hat for strong bond.
Step 2: Prepare the Hat
Place your hat smoothly and securely onto the center of the curved lower platen of the heat press.
- Preheat the Hat: Heat the press for 3 to 5 seconds without the patch, removing any moisture from the fabric and creating a completely flat surface. It makes a stronger bond.
Step 3: Position the PVC Patch
This is where you determine how to attach the PVC patch to the hat properly. Center your patch precisely on the front panel or your desired location. Use a ruler if necessary.
- Optional Tape: If you are worried about the patch shifting when you close the press, use two small pieces of heat-resistant tape on the edges of the patch to lock it into place.
Step 4: Protect with a Cover Sheet
This is the most critical step for PVC. Place your Teflon sheet or non-stick parchment paper over the PVC patch and the surrounding hat fabric. The cover sheet acts as a barrier, preventing the upper heat platen from scorching the fabric or melting the synthetic PVC material.
Step 5: Press the Patch
Once everything is aligned and protected, lock down the heat press. Ensure you are applying firm pressure. The timer will count down.
Step 6: The Flip and Press is Optional But Recommended
For maximum durability, some customizers utilize a flip-and-press technique:
- After the initial press, carefully remove the hat from the platen.
- Pull the sweatband away from the inside front panel.
- Place the hat inside out onto the platen so the reverse side of the front panel is now facing the upper heat platen.
- Cover with your Teflon sheet and press again from the back for another 10 to 15 seconds. This pulls the adhesive deeper into the fabric fibers.
Step 7: Allow to Cool completely
Vital tip: DO NOT touch or peel or test the edges of the patch while it is still hot. The adhesive needs to cool down to set properly. Moving the custom patch during the cooling process can mess up the bond. The hat should cool down for at least 1 to 2 minutes before being touched.
Troubleshooting Common Issues
The patch is not sticking, or the edges are peeling.
The adhesive can fail due to lack of firm pressure. The temperature should be increased by 10 degrees. Press and hold for 5 more seconds. Verify as well if the PVC patch has heat-seal backing for a heat press and is not a sew-on patch.
The PVC is melting or distorting.
Always use a Teflon or parchment paper barrier as a cover sheet to protect the PVC patch from direct heat. Lower the temperature, as the heat may be too high for that specific PVC material. Check the hat structure for a plastic mesh or delicate foam inside the hat that may be melting.
FAQS
How long do heat press PVC patches stay on hats?
Heat press PVC patches last for several years and up to 50 home washes.
How to heat press PVC patches on hats without melting them?
When heat pressing PVC patches on your hats, do not apply the heat directly. Instead use parchment paper to avoid direct heat contact. Also avoid using high heat settings.
How to remove heat press PVC patches from hats?
Remove the PVC patch with heat from an iron to weaken the glue. Freezing it can also do the job. Remove the patch and pull it off slowly and carefully. Avoid damaging the fabric. Use alcohol to clean the remaining glue stains.
How can heat press PVC patches be made more durable for hats?
For maximum durability, after you have heat pressed them onto your hat, sew the PVC patch borders to the hat for a more secure bond.
Heat Pressing Your Favorite Patches Confidently
When you learn how to heat press PVC patches on hats, you get to make cool custom hats. PVC patches are best because they are tough and have a 3D look that people really like.
Follow this step-by-step PVC patch pressing guide to get the pressure right, and use an essential cover sheet. You can create custom hats that look like they were made by a pro. This way, you can make hats that people will love and do it pretty quickly.
If you are looking to buy PVC patches for your headwear, The Eagle Patches USA has got you covered. We offer the best quality PVC patches with personalized designs according to your demands. We also offer fast delivery in the entire United States as compared to the competitors. So inquire today for free with our team!