Personalizing backpacks is always an ideal way to make them unique. It has become so popular that 55% of people are willing to pay extra for patches on their backpacks.
You can add a brand logo, a personal design, or a tattoo-inspired patch to your backpack. To make it last and look good, you need to know how to put a patch on a backpack correctly.
This guide shares all the safe and fast options. Follow these steps to attach a patch to your backpack quickly and effectively.
Different Ways to Attach a Patch to a Backpack
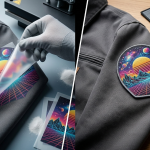
Alt text: how to apply patches on backpacks
Most backpacks are made from synthetic fabrics like polyester and nylon. So you have to be very specific about the patch method you use.
1. Iron-On Patches Method
If you want to know how to attach patches to a backpack with an iron, follow the steps below:
- Prepare the Patch: First, make sure that your bag material is suitable for ironing (e.g., cotton or denim). Then place the patch on the desired spot.
- Cover and Iron: Place a clean cloth over the patch. Set your iron to the right temperature (usually medium heat, but check the patch instructions).
- Apply Heat: Press the iron on the patch with the cloth on top for 30 seconds. Do not use steam. Move the iron in gentle circular motions to spread the heat evenly.
- Cool Down: Let the patch cool and check if it is firmly attached. If not, repeat the process.
Tip: Apply even pressure and check the fabric type to avoid damage.
2. Sew-On Patches Method
Sewing a patch provides a strong and permanent hold. Follow the steps below to attach a patch by sewing:
- Position the Patch: Place the patch on the backpack where you want it and secure it with pins or tape.
- Thread the Needle: Choose a thread that matches the patch and knot one end.
- Stitch the Patch: Sew along the edges with small, even stitches. Move slowly to avoid puckering.
- Finish: Tie a secure knot at the back and trim any extra thread.
Tip: Use strong polyester thread and double knot to prevent loosening.
3. Fabric Glue Patches Method
Fabric glue offers a no-sew alternative for attaching patches. Follow these steps for best results:
- Clean the Surface: Make sure the backpack area is clean and dry.
- Apply Glue: Spread a thin layer of fabric glue on the patch.
- Attach the Patch: Press the patch firmly onto the backpack and hold it for a few seconds.
- Drying: Let the patch dry according to the glue instructions, usually a few hours.
Tip: Avoid excess glue and do not move the patch while it dries for a stronger hold.
4. Velcro Patches Method
Velcro patches are perfect for removable or interchangeable designs. Follow these steps to attach a Velcro patch:
- Attach Velcro Base: Stick or sew one side of the Velcro to the backpack.
- Attach the Patch: Press the patch with the matching Velcro side onto the base.
- Press Firmly: Ensure the patch is fully adhered.
- Test the Hold: Gently pull to check if it stays in place.
Tip: Velcro works best on flat surfaces, and washing gently keeps it secure.
How to Choose the Right Patch for Your Backpack
The right patch can make your backpack look stylish and last longer. Consider the material, size, style, and how it matches your backpack before attaching it.
| Consideration | Details |
| Patch Material | Choose durable materials like embroidered fabric, PVC, or leather. |
| Patch Size | Ensure the patch fits the backpack surface without looking too big or small. |
| Patch Style | Match the patch design with your personal style or theme of the backpack. |
| Matching with Backpack Material | Select a patch method that works with your backpack fabric (iron-on, sew-on, glue, or Velcro). |
FAQs
Can all patches be ironed on any backpack?
No. Iron-on patches work only on heat-resistant fabrics like cotton or denim. Avoid synthetic materials like polyester or nylon.
How to remove a patch without damaging the fabric?
Use a hairdryer or iron on low heat to soften the adhesive, then gently peel it off. Avoid pulling forcefully.
Are sewn patches stronger than iron-on patches?
Yes. Sewn patches last longer and handle washing and heavy use better than iron-on patches.
Use the Right Patch for Your Backpack
After learning how to put a patch on a backpack, it can be frustrating when colors fade or edges unravel after a few days. This usually happens when the patch comes from a poor-quality vendor.
At The Eagle Patches USA, our experts create high-quality patches for your needs. From custom embroidery to woven patches, we make designs that look great and last a long time on your backpack.