Embroidered patches made with thread bring designs into the real world in a way that feels classical. For shop owners aiming to lift their clothing line, musicians hoping to move merch, or artists keen to wear their work, custom-stitched patches stay relevant across years. The raised details of the custom embroidered patch give it a lasting quality that flat printing can’t reach.
Beyond the first rough lines lies a path shaped by patience, thread catching light only at certain angles. Each stage unfolds without rushing, fabric slowly turning into something meant to be worn.
From blank paper to finished piece, movement matters more than speed. Stitches hold decisions made quiet hours before daylight. What begins small grows not by chance but through one step after another.
In this comprehensive guide, we will explore everything you need to know about the journey from a simple sketch to a beautifully stitched final product.
The Magic of an Embroidered Patch Custom Tailored to You
A quiet feeling of memory lives inside stitched fabric badges. Crafting one tailored to your group means shaping art you can hold. Light plays across the bumpy threadwork, giving shape and shadow to symbols. Built tough, they endure many trips through washing machines.
Outdoor grit, long years, constant use. They handle it all without fading, unlike enamel pins, which need to be taken care of or would be lost. Jackets take them well. So patch your bags, work clothes, and even caps.
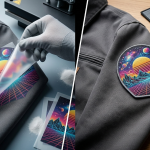
Starting with what threads can actually do. Thick threads mean fine details get lost and photographs turn muddy. Bold shapes stand out better than tiny marks. Solid areas of color work where shading fails.
Crisp lettering stays sharp after stitching, unlike delicate fonts. Strong outlines hold up through the process. Clarity wins every time fabric is involved.
How to Make a Custom Embroidered Patch
Wondering how custom embroidered patches come to life? Soon in this guide you will explore how to make a custom embroidered patch. Along with a step-by-step approach.
Getting familiar with how they are made can shape your designs in smarter ways. Digital tools meet careful machinery in surprising harmony. Each step follows a clear sequence, building toward the final product.
Phase One: Design and Optimization
Start with your artwork. This step shapes everything else. Simplify what you see in your mind. Thread can’t capture fine details. Thin strokes vanish when stitched. So do small words. Aim for letters no smaller than a quarter inch.
Pick colors that stand apart clearly. That contrast makes designs noticeable. Bold shapes work best. Vector files keep edges sharp. The cleaner the graphic, the stronger it looks when sewn.
Phase Two: The Digitizing Process
After you finish your design, printing directly on cloth is not possible. Instead, conversion becomes necessary. This step involves a specialist who uses dedicated programs to plot your image, turning visuals into coded stitching paths an embroidery device can follow, also called “embroidery digitizing.”
Direction, spacing, and tightness of each stitch get carefully chosen during this stage, which is a craft requiring sharp attention and deep experience.
Phase Three: Selecting Thread and Backing
First things first, pick out the parts you will actually touch before any machine turns on. From a set list of shades, grab just the right threads that line up with how your brand looks. Some go with stitched backing when they want that classic hold.
Others lean toward heat-activated iron-on backing if speed matters more than handiwork does. Then there are those who need flexibility. The Velcro backing lets them swap and shift as needed. Sewing patches to jackets or other fabrics is the most durable method.
| Backing Types | Details |
| Iron-on | Easiest to apply with an iron. |
| Sew-on | Most durable. |
| Velcro (hook-and-loop) | Easy to swap frequently. |
Phase Four: Production and Trimming
A digital file ready, plus fabrics chosen, sets the stage. High-speed machines with multiple heads begin moving across wide rolls of base material. Your design takes shape through tight rows of thread. Once every stitch finishes, silence follows briefly. Then precision blades separate each piece from the surrounding cloth.
Edges are treated next, turning intricate forms into smooth outlines. Other shapes, round or shield-like, receive a thicker stitched trim instead. This extra layer stops threads from unraveling over time. Each outline adds structure, turning raw cuts into something that lasts.
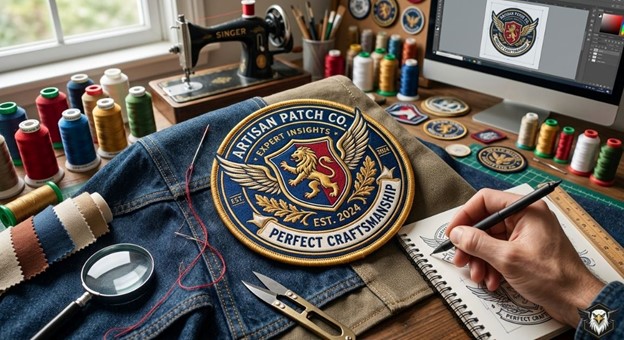
Expert Insights for Flawless Results
Every excellent embroidered patch custom made starts long before stitching begins. Think about shape first. Different styles of edges can surprise in the best way. Colors matter a lot, and you can go bold with them, but smartly.
Thread choice shifts texture without saying a word. Backing is not just support. It also sets how the patch feels on the fabric. Choosing between different border types also enhances the design. Placement changes everything, even if dimensions stay fixed.
Patch size is also an important factor for ensuring the best final looks. Mockups reveal what numbers hide. Feedback loops catch blind spots early. Surprise often lives in the overlooked step.
Start by skipping color shifts. Digital images can flow smoothly through many shades, but thread stays flat. When trying to mimic those changes, machines stitch separate colored strands side by side, usually ending up looking chunky and uneven. Choose single-color sections instead, this keeps the look sharp and bright.
Later on, take a closer look at the base material called twill. Instead of covering every bit with thread, leave parts open. Because gaps let the twill peek through, fewer stitches are needed. Less stitching means softer texture overall. The result feels clean, almost effortless. It is very useful when working with basic emblems or blocks of words.
A quick look at a digital preview or actual swatch helps spot problems early. What shows up on screen might shift once stitched. So, check it first. Catching fuzzy lettering now beats tossing out batches later. Before saying yes to mass output, hold something real in hand or study the pixels closely. Mistakes seen today won’t spread tomorrow.
FAQs
What are the features of embroidered patches?
Embroidered patches are traditional and classic. They have a raised texture, giving them a 3D look.
What is the easiest way to attach embroidered patches?
Iron on your heat-seal embroidered patches to attach them easily.
How to maintain embroidered patches?
The best maintenance is to avoid rough machine wash and harsh liquid cleaners. Trim any fraying thread to avoid more threads coming loose. Sew-on your embroidered patches for best results.
How to design embroidered patches?
You can use Photoshop to make your own unique designs or Pinterest to download some pre-made designs. Regardless, try to keep them minimal and bold. Tiny text and complex details can mess up the final look.
Make Embroidered Patches that Compliment You!
Crafting your own embroidered merchandise is an exciting endeavor that blends creativity with a rich, tactile tradition. By keeping your designs bold, understanding the digitizing process, and making smart choices about borders and backings, you can confidently navigate the production process. With these expert insights, you are fully prepared to bring your threaded masterpiece to the world.
The Eagle Patches USA is the best trusted patch maker in the United States. Offering customers outstanding quality custom patches tailored to their specific demands. Free mockups are given to customers before final production to ensure mistake-free processing.
Inquire today for a free quote from the experts!